Explore and Purchase Products from LMF-llc

LMF Rigid Truss Speed Bag Platform
Description
The best speed bag platforms are rigidly constructed. Commercial platforms exhibit to much vibration caused by a minimal frame supporting a round drum. A round drum cannot be rigidly supported. Presented are plans for building the Rigid Truss Speed Bag Platform. The Rigid Truss Speed Bag Platform is built using basic power tools for less than 100.00 USD with common construction grade lumber. Two truss geometries (30-60-90 and 45-45-90 degree) are presented that will accommodate 8 ft and 9 ft ceiling heights.
Mounting Considerations
- A masonry wall is ideal. A stud frame wall will work fine also, however consider using an exterior wall (typically 2x6 construction) and if possible locate close to an inside corner (less wall flex).
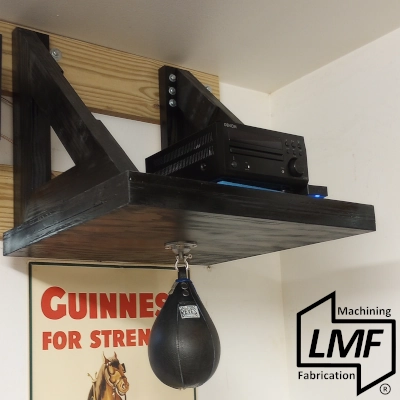
- If a stud frame wall is used and before constructing the platform, select the mounting location and locate and mark the centers of two adjacent studs. Studs are typically 16 inches apart however there could be variation from this standard. This platform design can accommodate about 3 inches of variation from the standard before a pair of horizontal spanner mounts must be used. The black platform shown above uses spanners due to non standard stud location.
- Mounting the platform is a two person job and will require at least one step ladder. The platform is not heavy (30 lbs) but it can be awkward holding the platform while marking the mounting hole locations on the wall.
- If mounting on a stud frame wall always drill pilot holes 1/2 the diameter of the lag screws used to mount the platform to the wall. Always use fender whashers with lag screws. If mounting to a masonry wall follow the anchor bolt manufacturers instructions.
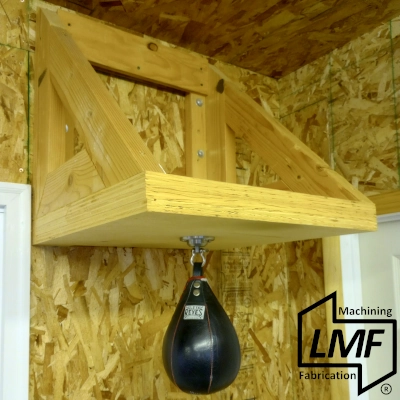
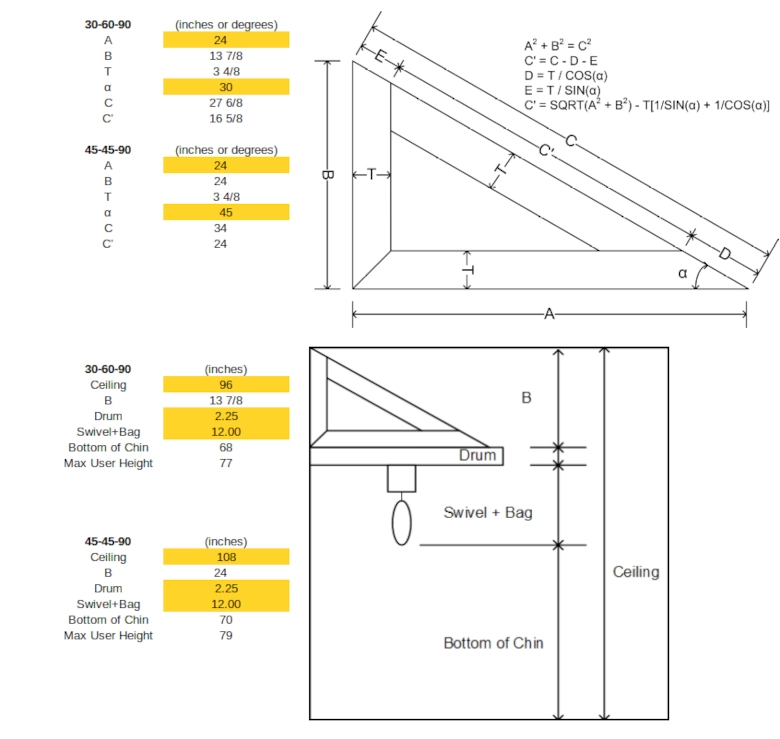
- Your height, ceiling height and bag and swivel size will help decide which truss configuration to use. The example below shows a 30-60-90 configuration with an 8 foot ceiling and a 45-45-90 with a 9 foot ceiling. Calculation Spread Sheet
Materials
- Plywood 3/4" x 24" x 24", 3 pieces. Sold pre cut at most big box home improvement stores.
- Plywood 1/4" x 24" x 24", 1 piece. Sold pre cut at most big box home improvement stores.
- 2x4 framing studs, straight, no twist, minimal knots, 4 pieces.
- Wood Glue, 32 oz.
- Construction Screws, 3".
- Construction Screws, 2".
- Construction Screws, 1-1/2".
- Platform to stud frame wall, Lag screws, 3/8" x 5", 8 pieces with fender washers.
- Spanners to stud frame wall, Lag screws, 3/8" x 5", 8 pieces with fender washers.
- Platform to spanners, Lag screws, 3/8" x 3", 8 pieces with fender washers.
- Platform to masonary wall, 1/2" x 5-1/2" Wedge Anchor, 4 pieces with nuts and fender washers
Suggested Tools
- Circular saw.
- Hand Power Drill.
- 3/8" and 3/16" drill bits.
- Driver bit for construction screws.
- Tape measure.
- Protractor or triangle.
- Pencil.
- Framing or combination square.
- Pair of 6" C-clamps or 12" pony clamps.
- Safety glasses.
Assembly
- Stack the three 3/4" x 24" x 24" plywood squares. If any of the edges are long, trim so all edges are flush.
- Cut truss members A, B and C' from 2x4 framing studs. Lay out A and B on a flat surface and square up. Measure C' to fit to A and B. Don't assume C' length from the calculation, measure for a good fit.
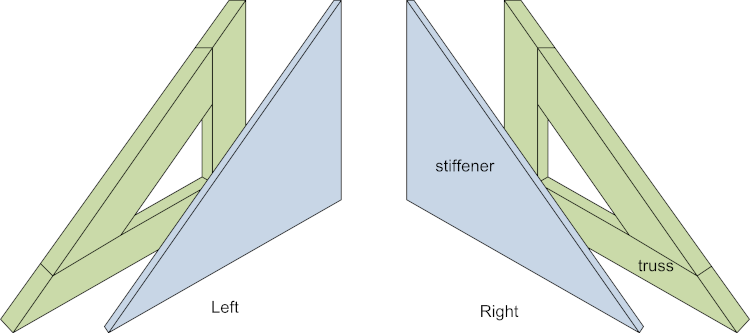
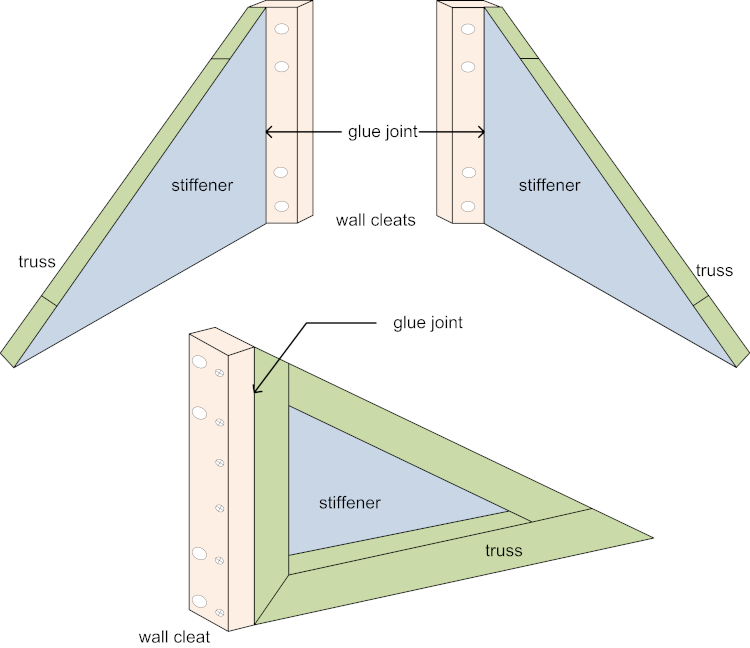
- When satisfied with A, B, C' layout, measure and cut two triangle stiffeners, dimensions A, B, C', from 1/4" x 24" x 24" plywood square, to overlay each truss .
- Apply wood glue to the surface of each truss member. Overlay the truss with the 1/4" stiffener. Careful not to disturb the truss layout. Place a weight on the stiffener and allow the glue to set up for a few minutes.
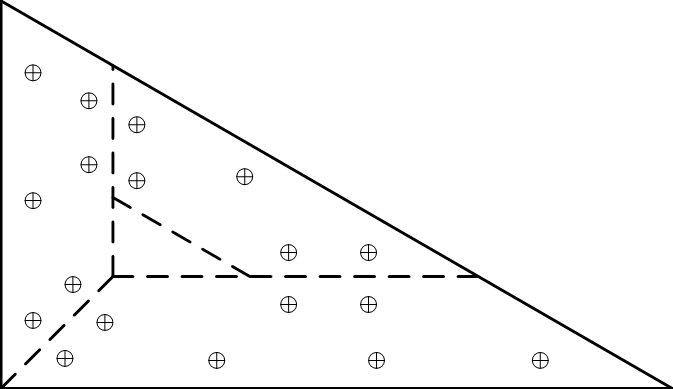
- Screw the stiffeners to the truss members using the 1-1/2 inch construction screws. A screw pattern similar to that shown below will ensure good glue bond between the stiffener and truss members.
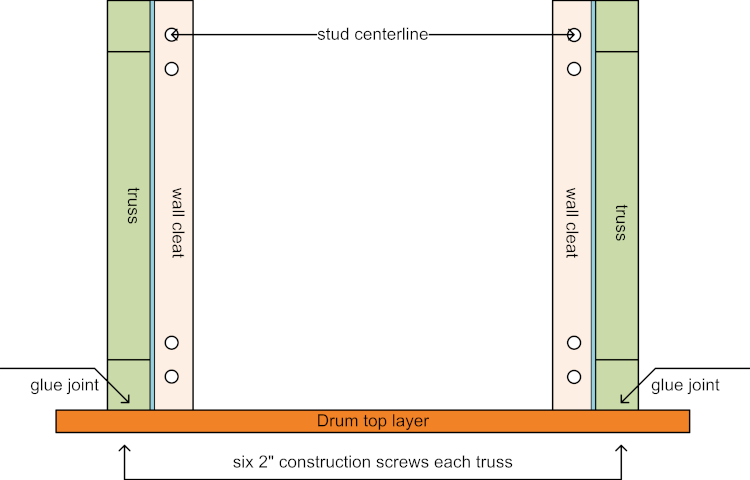
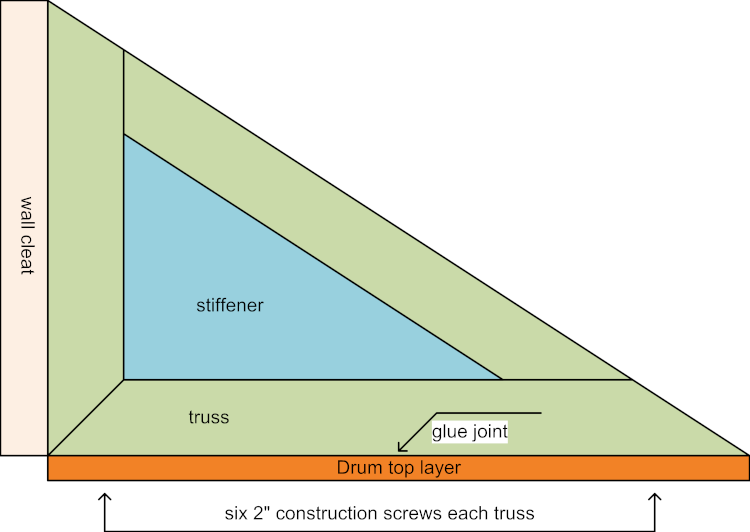
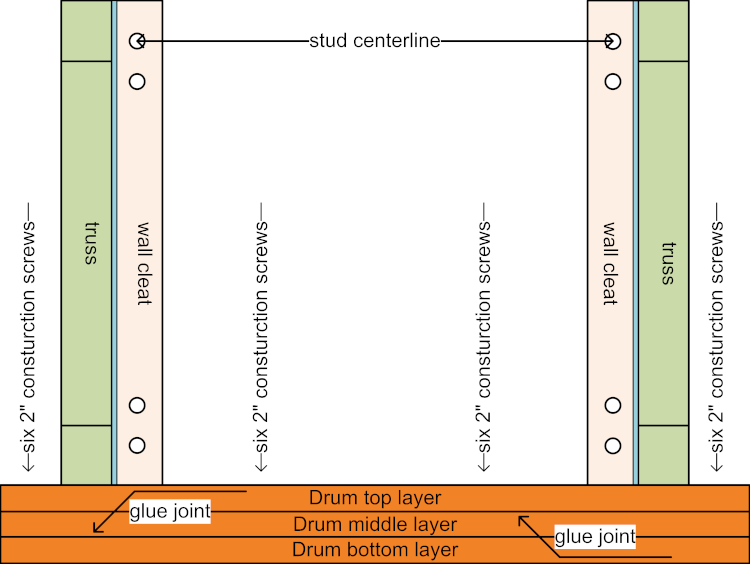
- Cut two wall cleats from 2x4 framing studs to length B. Drill four 3/8" mounting hole in each wall cleat. Attach wall cleats to truss members using wood glue and six 3" construction screws.
- Attach the top layer of the drum, 3/4" x 24" x 24" plywood, to each truss using glue and 2" construction screws. Ensure spacing between trusses corresponds to stud spacing if applicable.
- Attach the middle and bottom layers of the drum to the top layer. Apply glue between the layers. It is not necessary to coat the entire surfaces with glue, a 3" square lattice pattern is sufficient. After stacking up the three layers of the drum, secure with 2" construction screws in a pattern of four rows with six screws per row evenly spaced. Install the screws from the top side, not the bag side.
- Install the speed bag swivel before hanging the platform.
- Download this page for reference.

Copyright 2025 by LMF-llc